One of my favorite aspects of non-traditional photographic printing is the vast volume of clever methods that have been invented, and are still being invented, to make a photographic image. The processes that I have been working with remind me of the mostly failed and semi-successful flying machines from the early days of aviation. You can’t run an airline on them, but when something looks this great, who cares?

The Marquis d'Ecquevilley in Arles, France and his multiplane. (Hulton Archive/Getty Images)
There’s a set of old methods for making photographic prints that involves using naturally occurring proteins as binders and agents in the photographic chemical reactions. Folks have used, among other things, egg whites, tree sap, bones, skin, and milk. There’s a heavy cheese culture here in Wisconsin, so to the dairy farm I go.

The proteins in cow’s milk are about 80% caseins, so the name of this process is casein printing. To get the caseins into a useful form for printmaking, first you need to curdle the milk, strain the curds from the whey, and then dissolve the curds. Many practitioners store powdered milk to reconstitute and curdle since it has a long shelf life. However, in my house we're always well stocked with dairy products so I got my curds by rinsing the whey off some locally made cottage cheese.
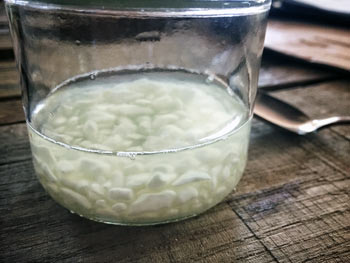
Here are my curds in a bath of ammonia, they will be ready to use in about 24 hours. During this time, I’ll preshrink and size my paper to prep it for the rigors of cheese-based artmaking; smooth, thick watercolor paper works well. Once the plump cheese curds have become a rather disgusting, stinky, gluey goo, it’s printing time.
Casein printing involves mixing the casein goo with potassium dichromate and pigment, coating a substrate (like paper), and then exposing the paper, topped with a negative, to UV light. The casein and dichromate mix will react to

UV light, becoming harder the more light it is exposed to. The pigment will stay contained in the hardened casein, so the clearer areas of the negative will allow more light to pass and the paper will retain more pigment, creating dark areas, while the more opaque areas of the negative will allow less light, holding less pigment, and leave lighter areas.
The trick with this process is that the layers are very, very thin. So in order to create a richly toned image, it is necessary to add many layers of the casein emulsion, which means going through the whole mixing, coating, drying,

exposing, washing, drying cycle over and over. It takes a long time, but this opens the door to making wacky prints, using off-the-wall colors; or subtle monochrome prints, building density slowly and sensitively; or even creating true-to-life color prints with a skillful use of color and negative separations.
Each new coating doesn’t look like much, but eventually things start to happen. This process seems to have an unending variety of possibilities for someone who is happy to work slowly and with sensitivity to the materials.